So quite a while had passed since I built my first 3D printer, and since it was so unreliable I had basically abandoned it. I had just started an apprenticeship and was earning just under minimum wage so I could now afford to rebuild it in a slightly more decent way.
While I was now earning money, I still couldn’t afford to buy a kit or proper 3D printer components, so the first stage was to salvage everything of value from the old printer. I ended up reusing the hot end for quite a while, the motors, the motor controller, and a few other bits.
The design
So with this printer I realised that the whole metal scaffolding thing just wasn’t going to work. I thought about what I could do better on this one and realised that I had just completely ignored the most obvious construction material of all: wood.
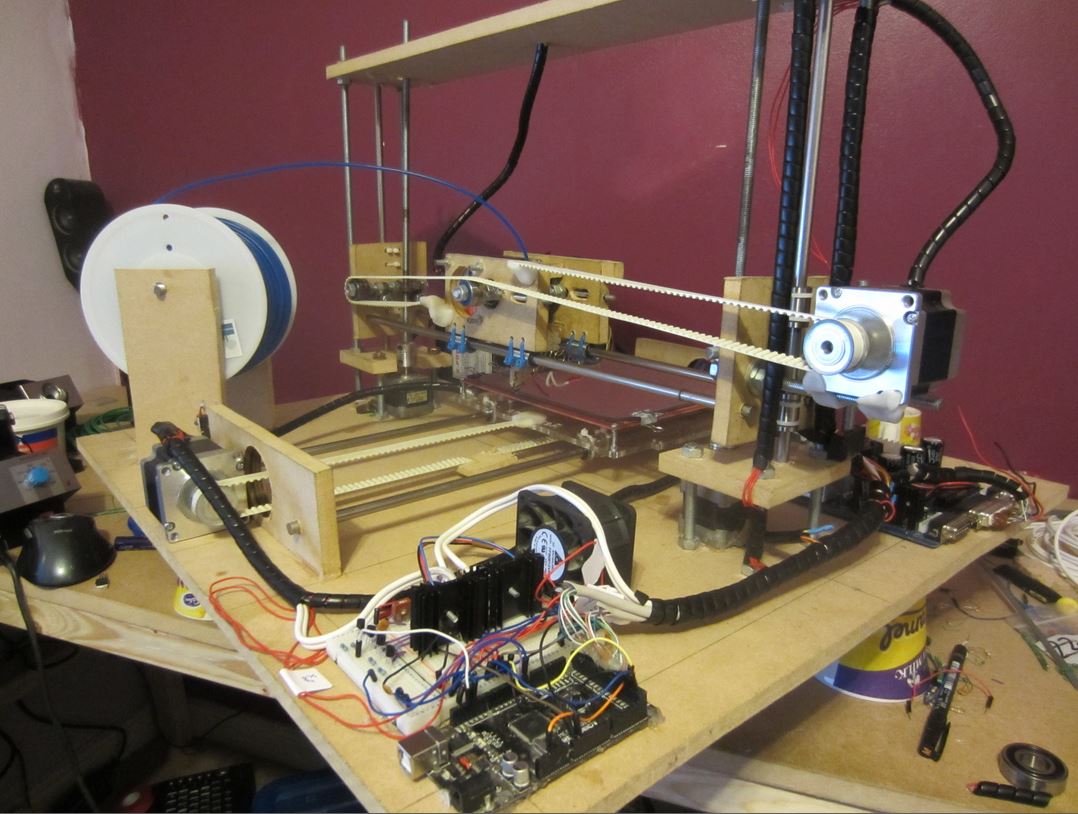
I worked at a school and their DT dept used a piece of software called Spaceclaim so I thought I’d have a go at using it. It turned out to be so easy to use that I still use it today. I came up with a new design, replacing large parts of the frame with MDF panels and moving from an XY + Z system to a X + ZY system.
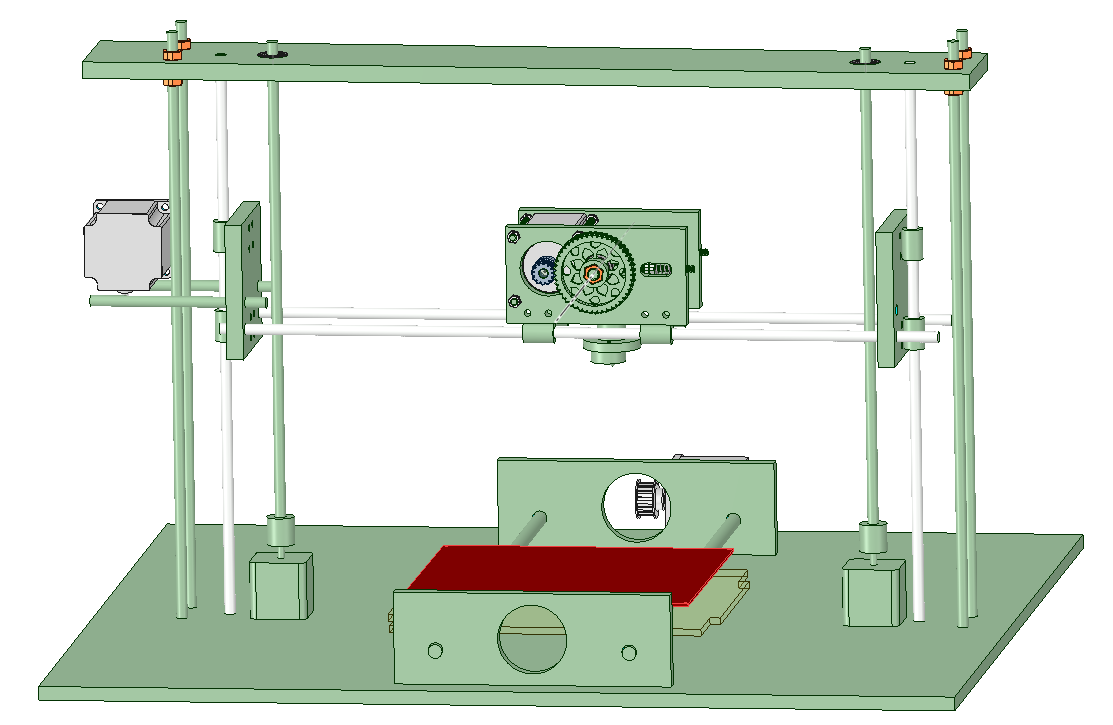
The only component I replaced with the new design from the start was the heated bed. Ready made ones weren’t so expensive now and I felt better using safe voltages for everything on the printer. The PCB also weighed a lot less than a sheet of aluminium and 8 heating elements so the print speed could be increased.
Assembly
Assembling this printer was a hell of a lot easier than assembling the mark 1. First of all there was no brazing required as I basically used almost no right angle nuts, and in the few instances I did need them I had plenty from the old printer. Secondly wood is much easier to work with than steel and brass as you can sand and cut it all by hand.
Extruder
I actually started with the extruder assembly first because I thought that might be the most challenging. The design was mostly the same as the original but this time instead of poorly sculpted polymorph plastic to hold everything together, I would use mostly accurate wood. The hobbed bolt and bearing here are actually the same ones from the original printer.
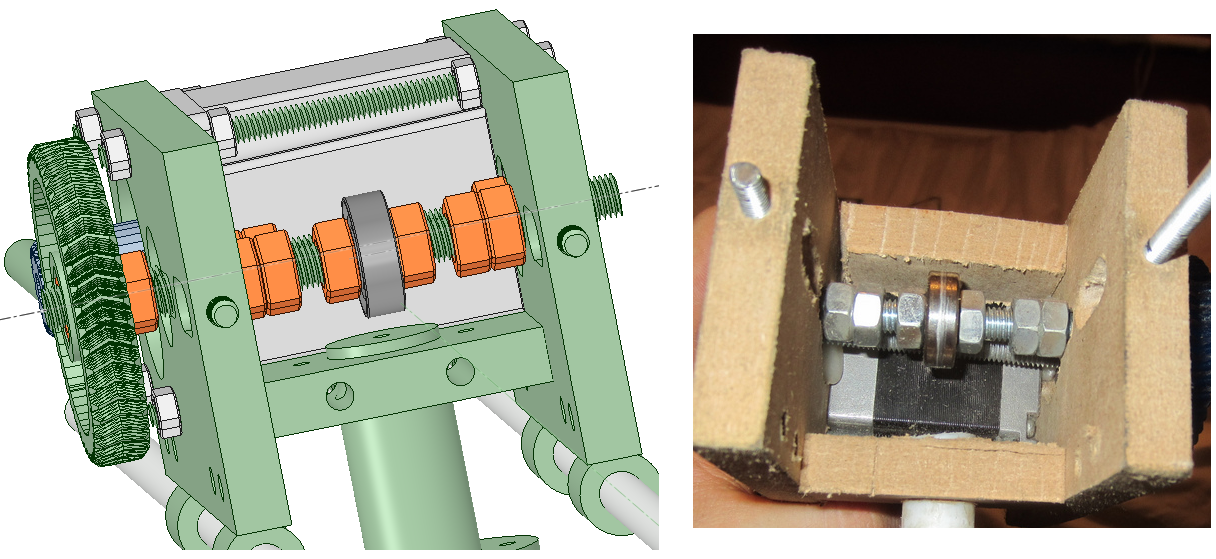
One of the parts I replaced on this printer were the two gears that drive filament press. I was lucky enough that the DT dept at the school I worked at had just bought a 3D printer, and it was my job to install and test it out. I used this as an opportunity to print out the gears I needed.
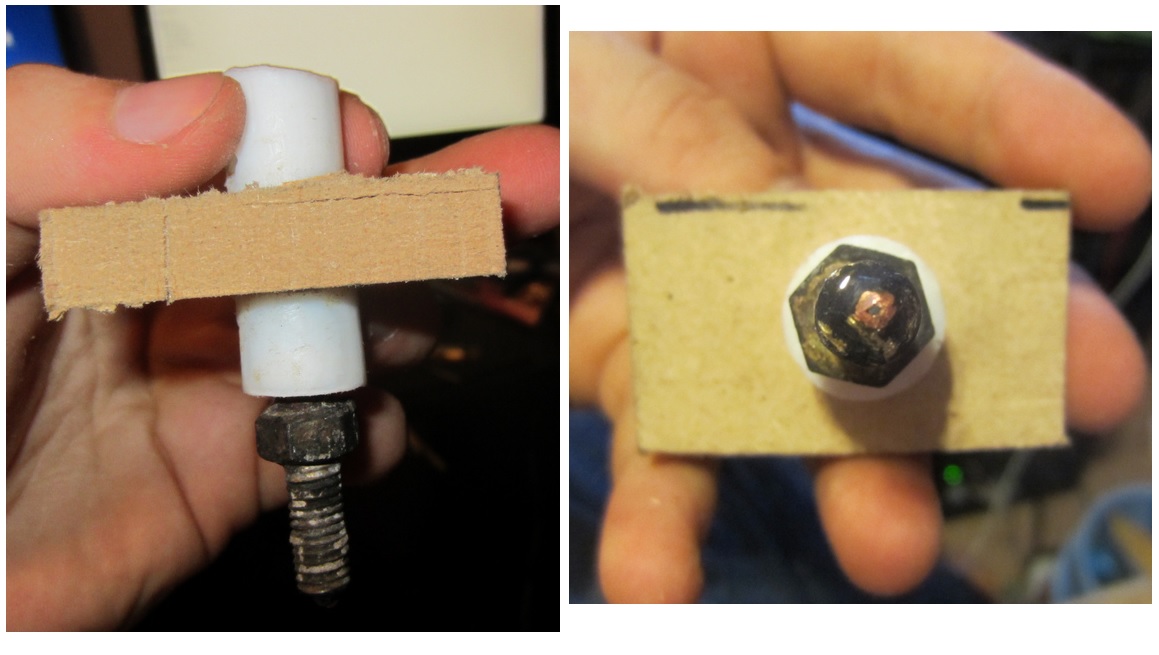
I used the nozzle from the mark 1 3D printer but replaced the heating coil and PTFE insulator which were worn and damaged. I mounted it to a block of wood which would sit inside the new Y carriage. I also took the opportunity to polish and flatten the nozzle into a cleaner edge for more precise prints.
Frame
The rest of the frame was pretty straight forward to cut and assemble, it was mostly just different sized rectangles of wood.
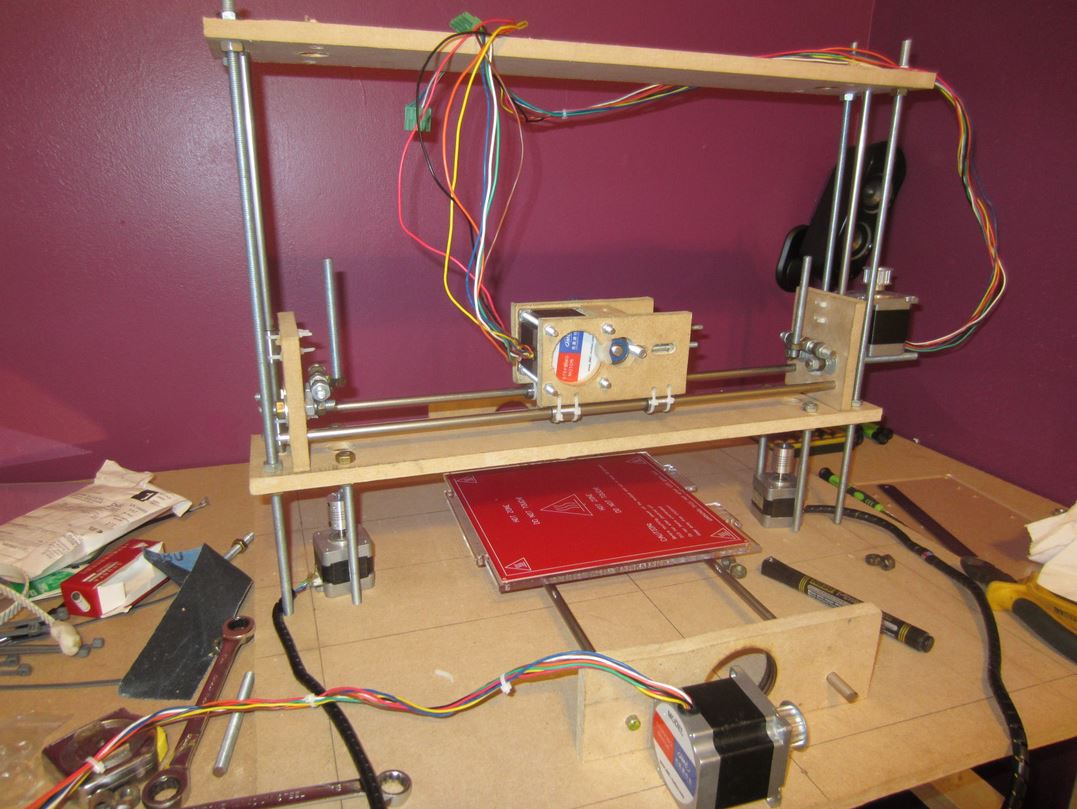
You might look at that and wonder why there is a piece of wood across where the printer would be printing, this was because I cut the and drilled the two pieces of wood together and just cut the block once it was bolted in position.
You can also see in this image that I swapped the Z arrangement from a single central motor to two smaller steppers lifting each side. You might also notice that the nuts are in place for the Z axis threaded rods which would act as lead screws in this machine. Lead screws were and still are ridiculously expensive so using what I had was preferred.
By this point I was also able to buy proper smooth rods, which were very important in getting good accuracy from the printer. Deformed rods cause different irregularities in the print depending on which axis the deformation is on. On the X and Y you get lines with curves where they should be straight, on the Z axis you get wobbly looking objects and holes that you can’t fit screws through.
I was also able to buy 8mm linear bearings, these were incredibly cheap and made everything a lot simpler.
The heated bed
The heated bed had been replaced from the start with a PCB heated bed. This was great for the heating but I needed a surface to print onto. I had switched from using ABS filament to PLA, which was easier to work with and smelled nicer than ABS when it was running through the extruder. The problem was that the PLA did not stick to the Kapton tape I had used on the original printer.
I tried loads of different surfaces for printing, glass, acrylic, blue painters tape, kapton tape, I even tried sanded glass. I had so many problems getting the models to stick to the print bed until eventually I read somewhere that someone was using the blank side of a piece of stripboard to print on to. It was the first material I could get the PLA to stick to consistently. The way it worked was that the nozzle would force the the plastic part way through the holes giving the model hundreds of anchor points.
There were negatives to using stripboard however, you had to get the start Z offset absolutely correct or the machine would inject the plastic through the holes forming a sort of permanent plastic rivet. Another problem was that the model would come out with hundreds of dimples on the bottom, which is not nice.

Once a model was riveted there was no way to remove it without either destroying the model or the stripboard.
The electronics
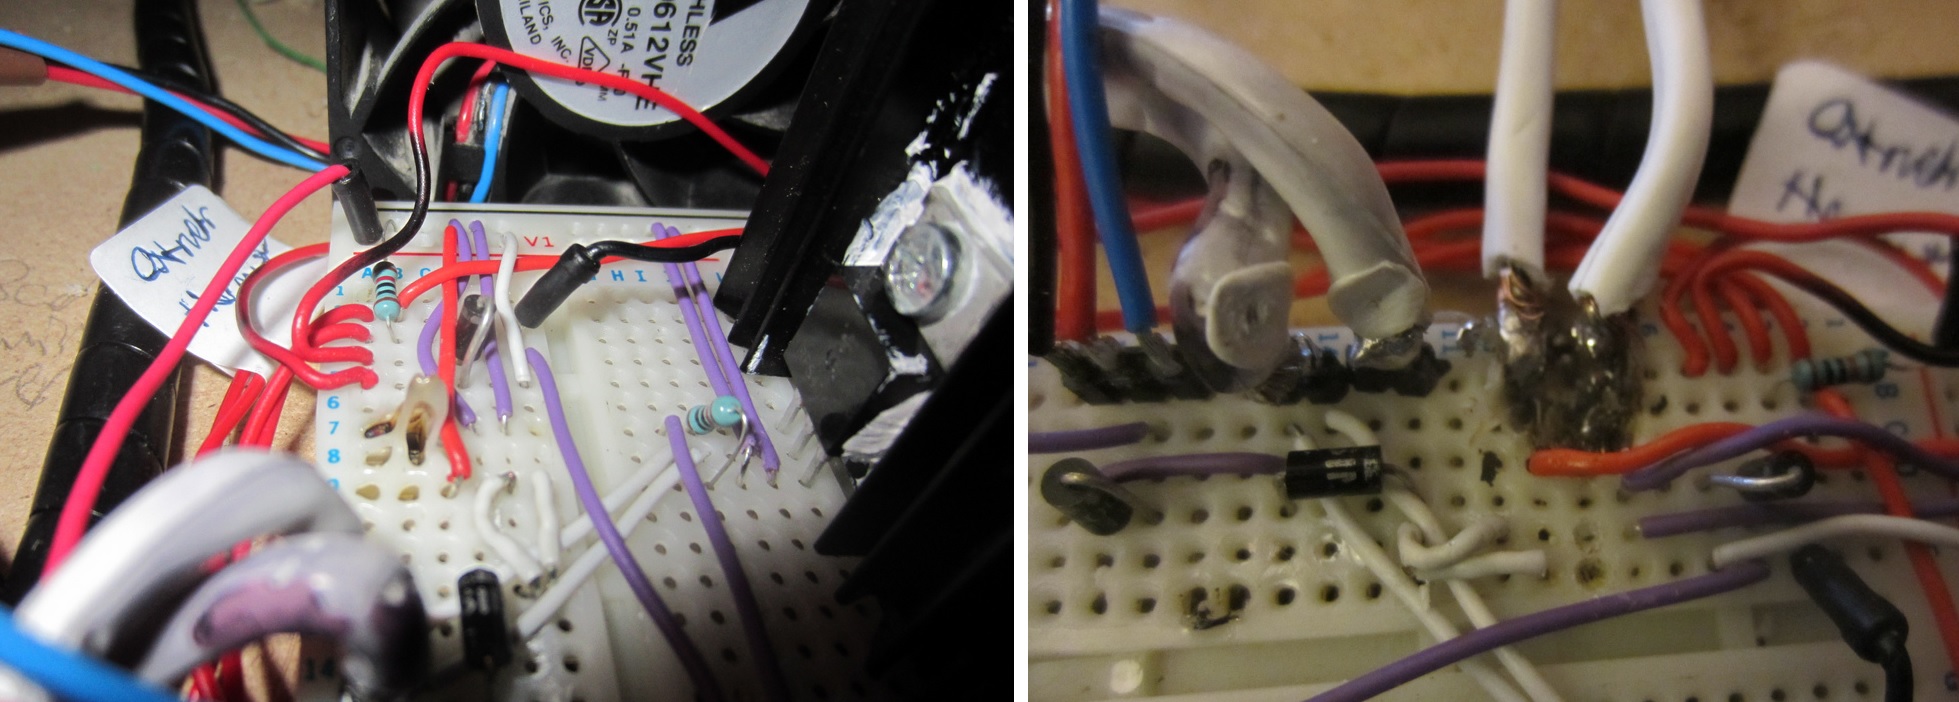
I mainly reused the electronics from the old 3D printer and assembled them on a breadboard. The idea was that I would eventually make a PCB for the control electronics and have everything tidied up, but I never got to that stage. Running this through a breadboard posed some challenges, mainly around that fact that breadboards are really only designed for prototyping and the fact that the current requirements for this printer were so large.
The only significant difference was that there were now 2 mosfets to control both the heated bed and the hot end. The small TO220 heatsinks I had were not large enough to dissipate the heat from this extra load, so I had to add in this computer fan you can see in the image. This was a very violent fan and it injured me several times.
Results
In the end this updated design was a lot more reliable. There were still problems but it allowed me to print a lot of things for quite a long time. Eventually as better open source hot end designs became popular I was able to buy them fairly cheap on ebay. I went through 2 new hot ends before eventually buying brand new 3D printer, the XYZ da Vinci 1.0.
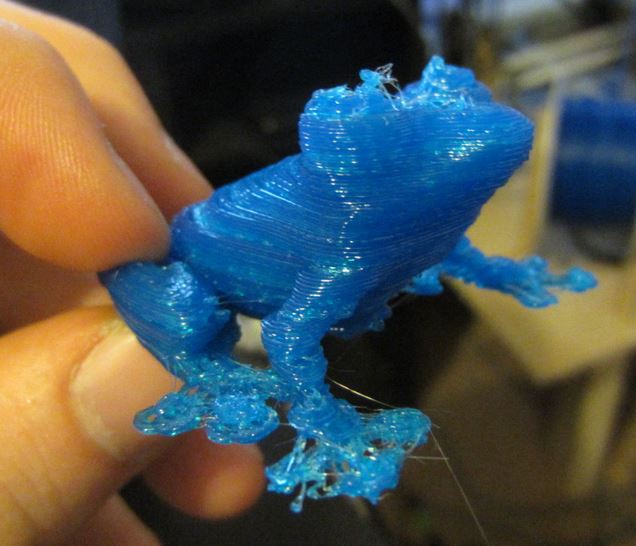
Here is a print before calibrating the settings, I think here the temperature and layer thickness were too high.
Here is a video of it printing.
Overall this printer worked pretty well, especially once I got a more precise extruder nozzle. It was fun but quite time consuming. I think ran through about 6KG of plastic through it over its lifespan.