It was October 2012 and Quadcopters had started getting popular but were still too expensive to just buy one outright. I knew that the components were cheap as I had already bought quite a few of them for other projects. Things like GPS modules, accelerometers, and gyroscopes cost almost nothing. I also now had my 3D printer in a working condition and I could actually use it to build useful things.
Design
I started off designing my quadcopter around a breadboard at the center and everything else spanning from that. This was actually a really stupid design for a couple of reasons:
- A rectangle is not a great shape for structural integrity.
- Breadboards actually weigh quite a significant amount.
- With the breadboard taking all the space, there was nowhere to mount feet or other accessories.
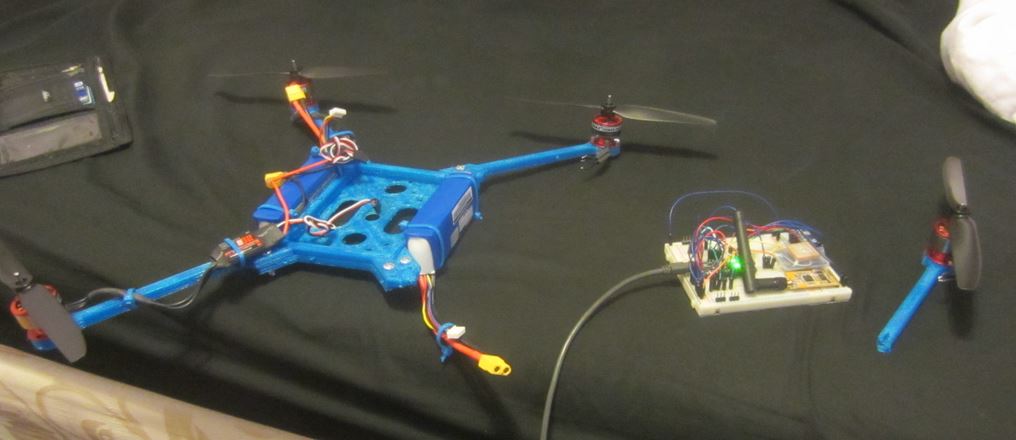
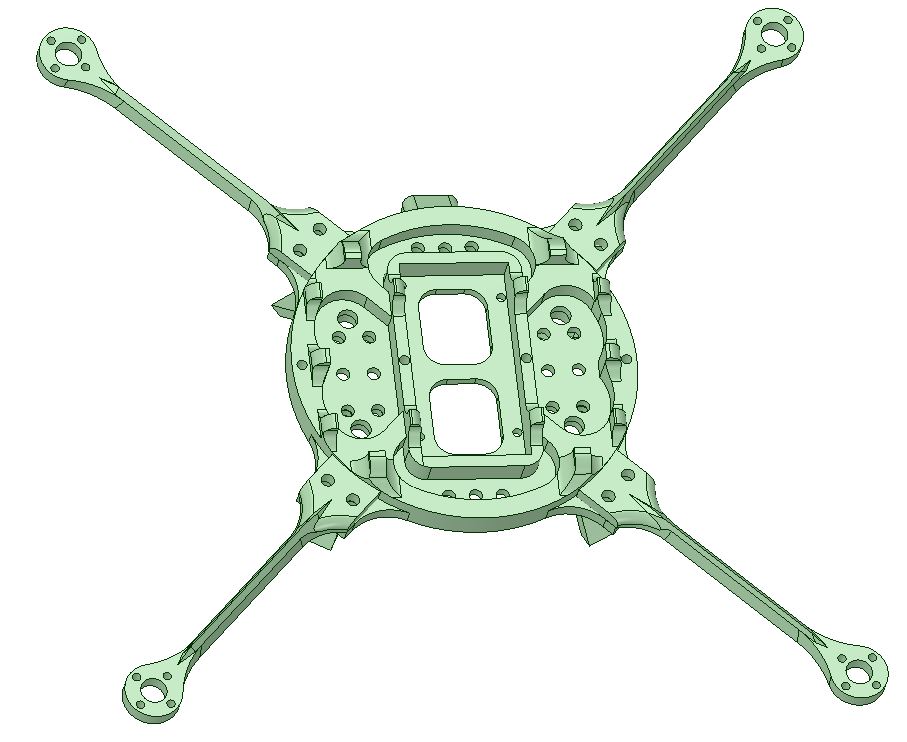
So after assembling this one during the initial tests the whole quadcopter would flex and distort. I realised I needed a better design. I based the new design around an Arduino Mega controller with a circular center that also had space for the batteries to be mounted.
Manufacture
From my perspective printing as many components as possible was the best idea, PLA filament was cheap and running my 3D printer cost almost nothing. So I started by printing the main body, from what I remember it took 8 hours to print.
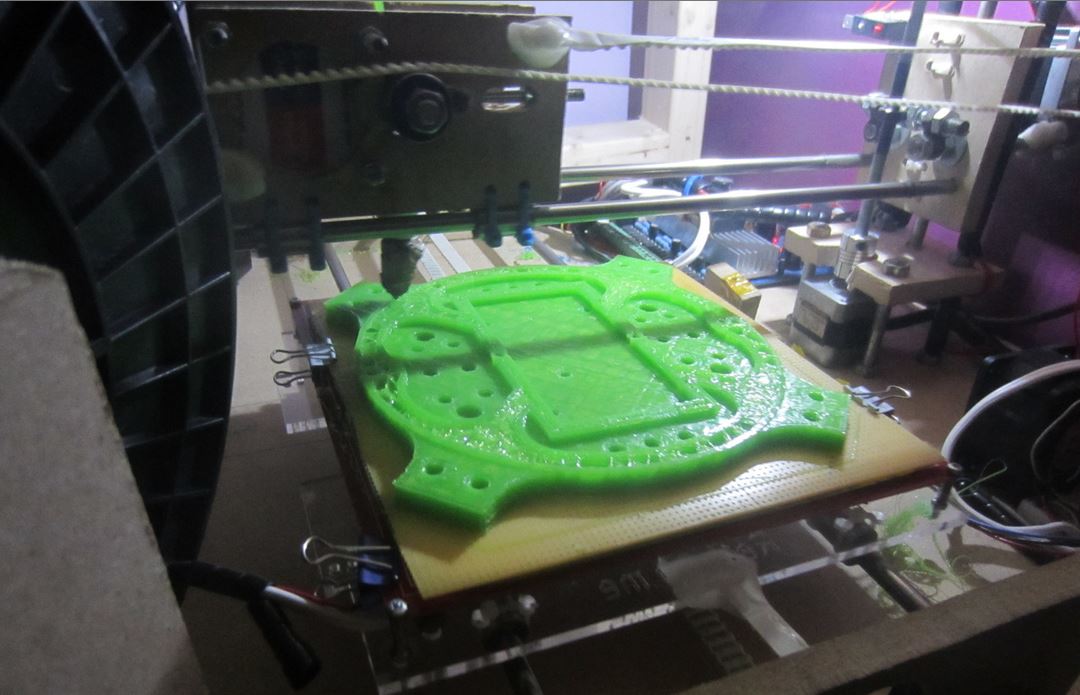
After that I printed the arms which took about an hour each. The frame was screwed together and weighed about 200-300grams in total. This is pretty heavy when you consider modern carbon fiber frames, but it also only cost about £1 in materials.
The electronics
I would use an arduino mega at the heart of the quad copter with a long range RF TTL transmitter for serial remote control. The microcontroller would be powered from the same supply as the motors, which was 2 11.1v 2.2AH 3S LiPo batteries.
The props were powered by 4 Emax CF2822 1200KV brushless DC motors. These motors are incredibly powerful, the power to weight ratio is truly insane. One motor running at 11.1v with 8inch props could produce 500grams of thrust. This was way more than enough to lift the heavy frame and batteries.
Software
I originally tried out writing the control software myself, in my mind it seemed to be fairly straight forward and I thought it might be fun. So I got a minimal interface set up and began testing, it became immediately obvious that there was something missing from the basic algorithm I had implemented. The quadcopter couldn’t maintain itself, even on a flat surface, it would lift then drop then lift then drop due to hysteresis. This would continue until the quadcopter eventually flipped over.
After searching online I realised I needed a PID algorithm. While researching the issue I actually found an open source quadcopter control software called MultiWii, named so because the original version used a Nintendo Wii controller as the sensor. By the time I used it on my quadcopter it already supported a large number of configurations and sensor hardware.
The multi wii software was designed to use a regular transmitter receiver pair, I didn’t have this, and I didn’t really want to spend any more money. Luckily this firmware also implemented a serial control protocol so I was able to use my RF TTL serial link and the existing transmitter software I had written. The desktop application would read the output from an Xbox 360 controller and send the information to the quadcopter over the RF link.
The propellers
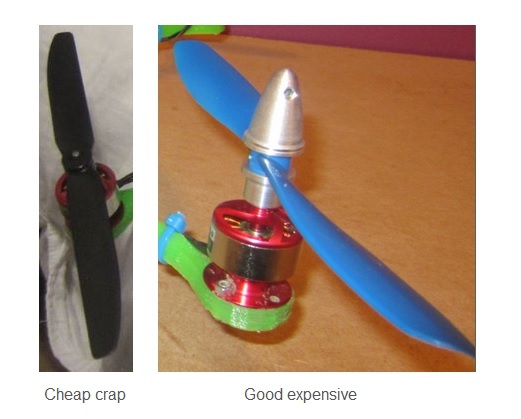
I started out using some cheap 8 inch propellers. These propellers mounted to the motors using the friction of the plastic alone, which was definitely not enough for this sort of application. The other problem with these props is that they were no where near balanced and deformed quite easy.
So I splashed out on some higher quality props and collet fittings. The new propellers also needed balancing to work at the maximum speed the motors could turn them. I tried to do this without one of those fancy prop balancing things, but I just couldn’t do it accurately enough and the motors continued to vibrate. So I spent a whopping £30 on a stupid little prop balancing thing, which worked fine, but was just insanely overpriced for what it was.
Prop guards
I quickly realised after a couple of test flights that I was not good at flying quadcopters. The propeller edges were very easily damaged, so I really needed something to protect the propellers. Let alone the fact that these things were spinning so dangerously fast that it could easily rip my skin apart.
There was a bit of a challenge in manufacturing these protectors in that my 3D printer had a limited build area, about 18cm by 18cm. The propellers were roughly 20cm in length, so I had to come up with some way of printing in parts while maintaining rigidity. I printed them in 4 segments diagonally across the build platform. They were bolted together with small machine screws which meant they were rigid enough for low speed collisions.
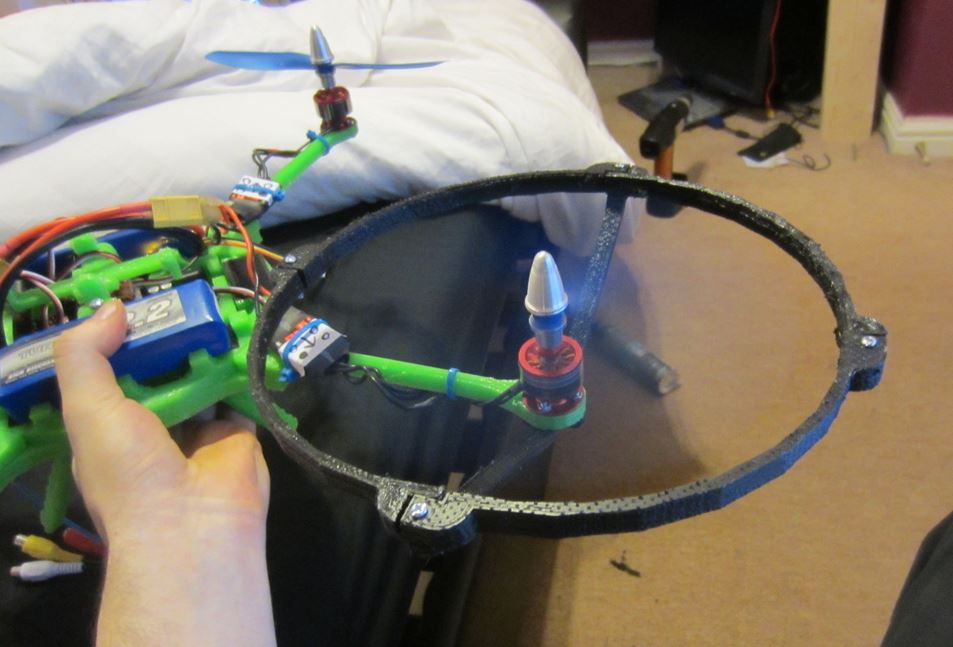
The results
The actual quadcopter itself came out fairly well, and mostly worked. One of the areas that would of needed improvement was the vibration from the propellers and motors which was only slight, but in the long term would have caused unreliability.

Unfortunately it was the middle of winter when I started making this quadcopter, so the weather was never good enough to fly it outside. The wind meant that on the couple of times I tried I always ended up breaking one of the arms off when it inevitably crashed into the ground.
The other problem I didn’t realise I was facing until my next project involving the Xbox 360 controller was that I was working with a cheap fake controller. This fake was almost identical to the real ones but the effective working angle on the joysticks was about 50% of what you’d get on a genuine controller. This meant on top of my inexperience with flying quadcopters I was also dealing with incredibly imprecise and overly sensitive joysticks.
The only video I could find was of some test flights I conducted in my bedroom. This quadcopter was fun to make but in terms of flying experience I think I would have preferred a professionally made one.